
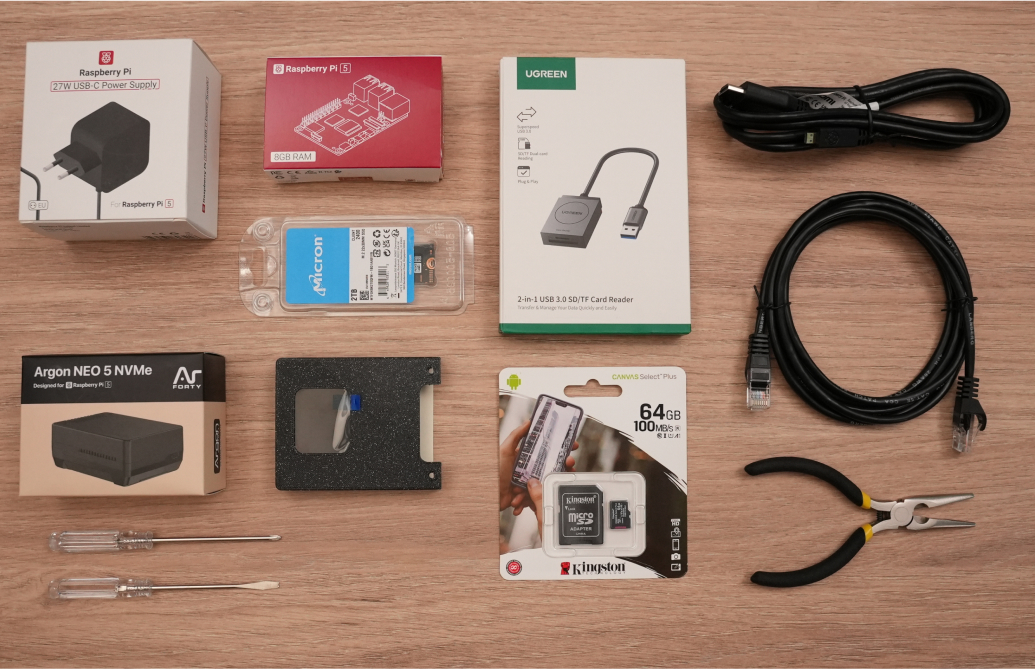
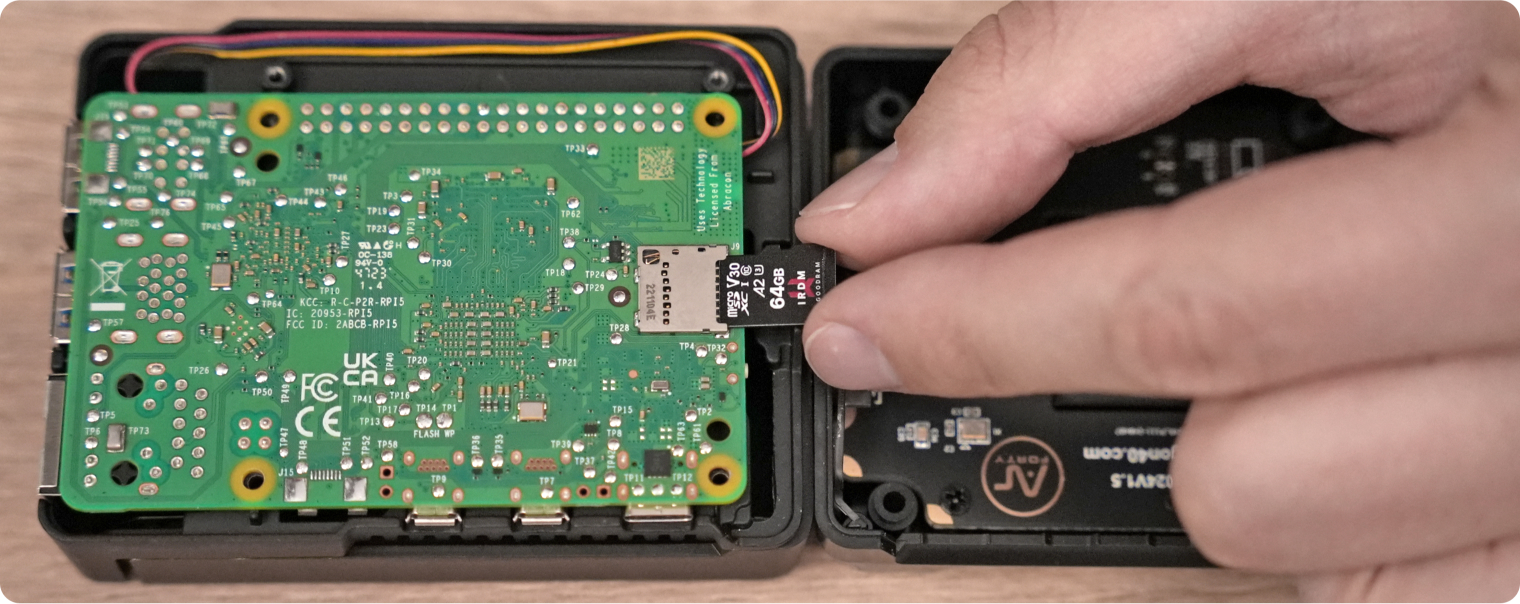
microSD Card
High-speed microSD card (preferably 32GB or larger) for storing the operating system and node data files, with plenty of space for future expansions.
How to Get Running Your Ethereum Node on Raspberry Pi
Follow the instructions below to write images on the microSD card:

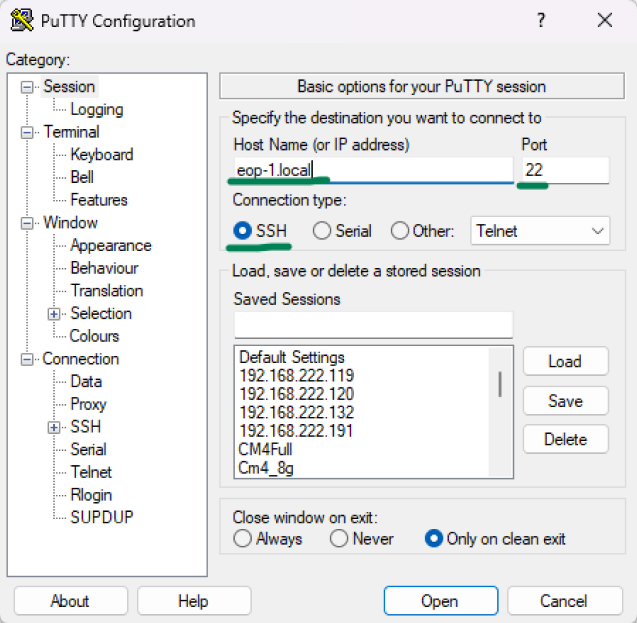
For Single Mode device, the following settings can be configured:

If you click the Advanced button, you can configure these additional options:
Note: Ethernet connection is recommended

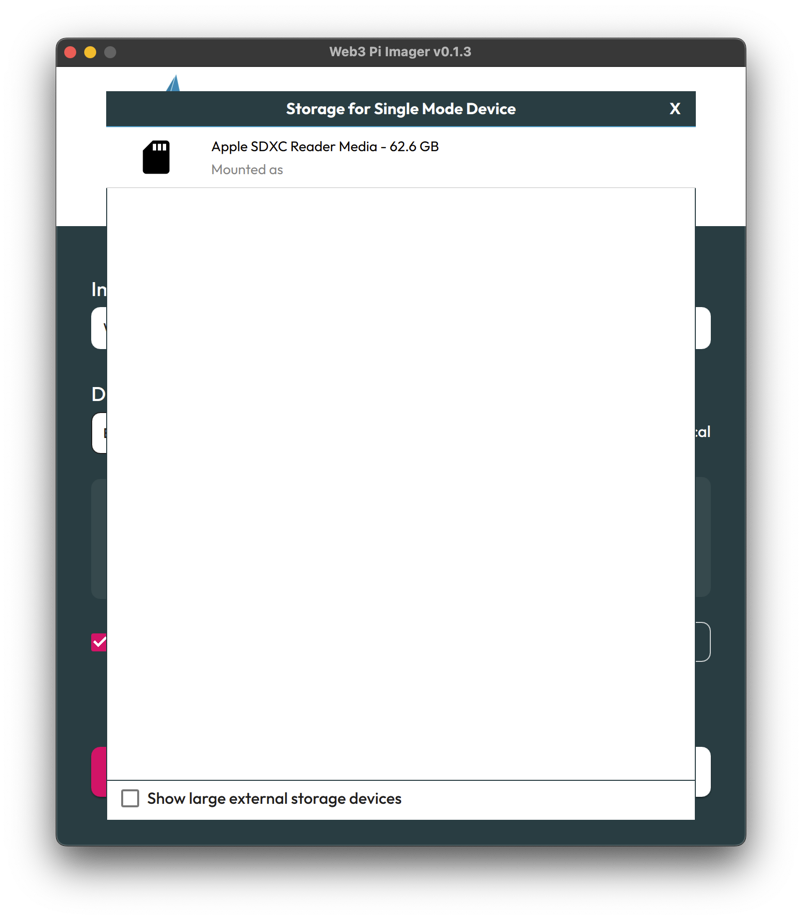
After setting up the configuration and clicking "Next", a dialog box will appear allowing you to select the drive where the image with settings will be saved.
Note: Make sure you select the correct drive to avoid data loss on other devices
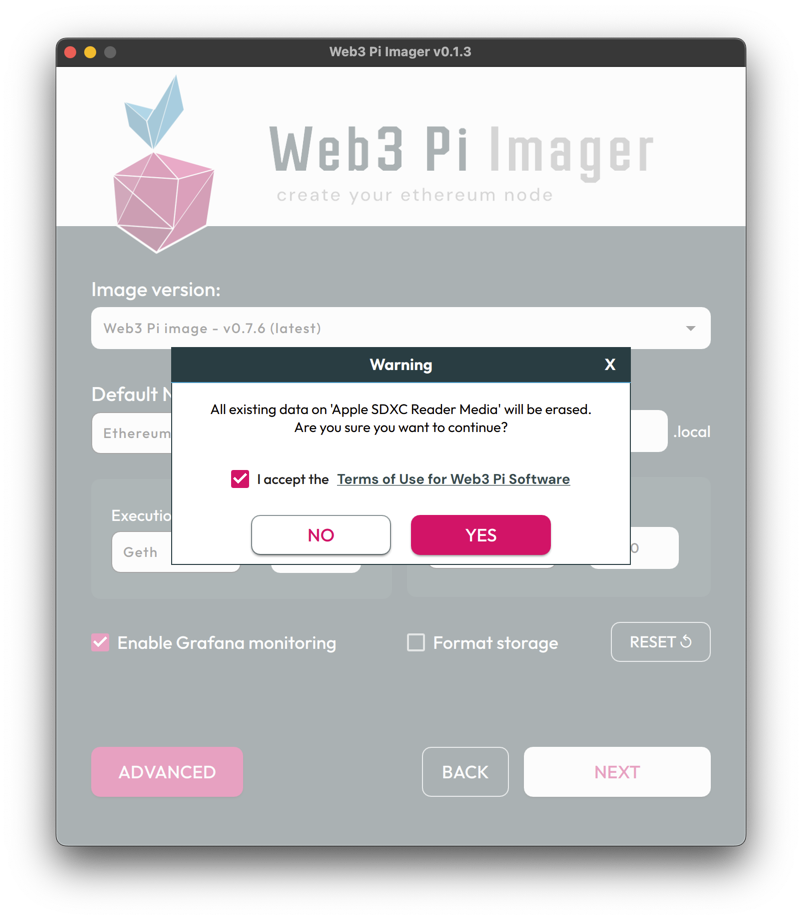
After selecting your target drive, a warning dialog will appear informing you that all data on the selected device will be erased.
Note: This is your final confirmation before the write process begins - ensure you have selected the correct device
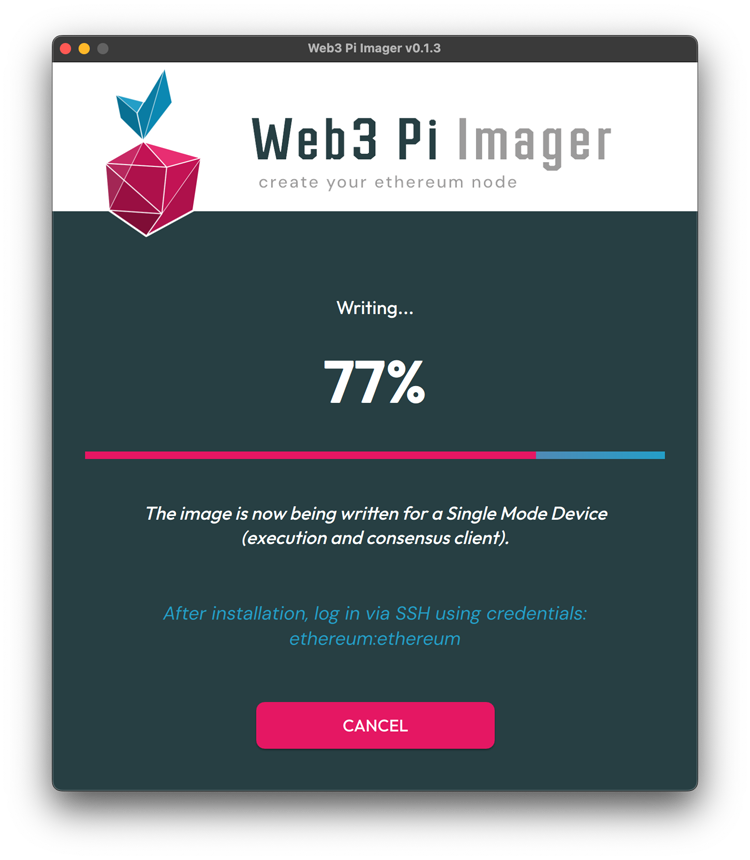
After confirmation, the writing process to the selected storage device begins.
Note: Do not disconnect or remove the storage device until both the writing and verification processes are complete
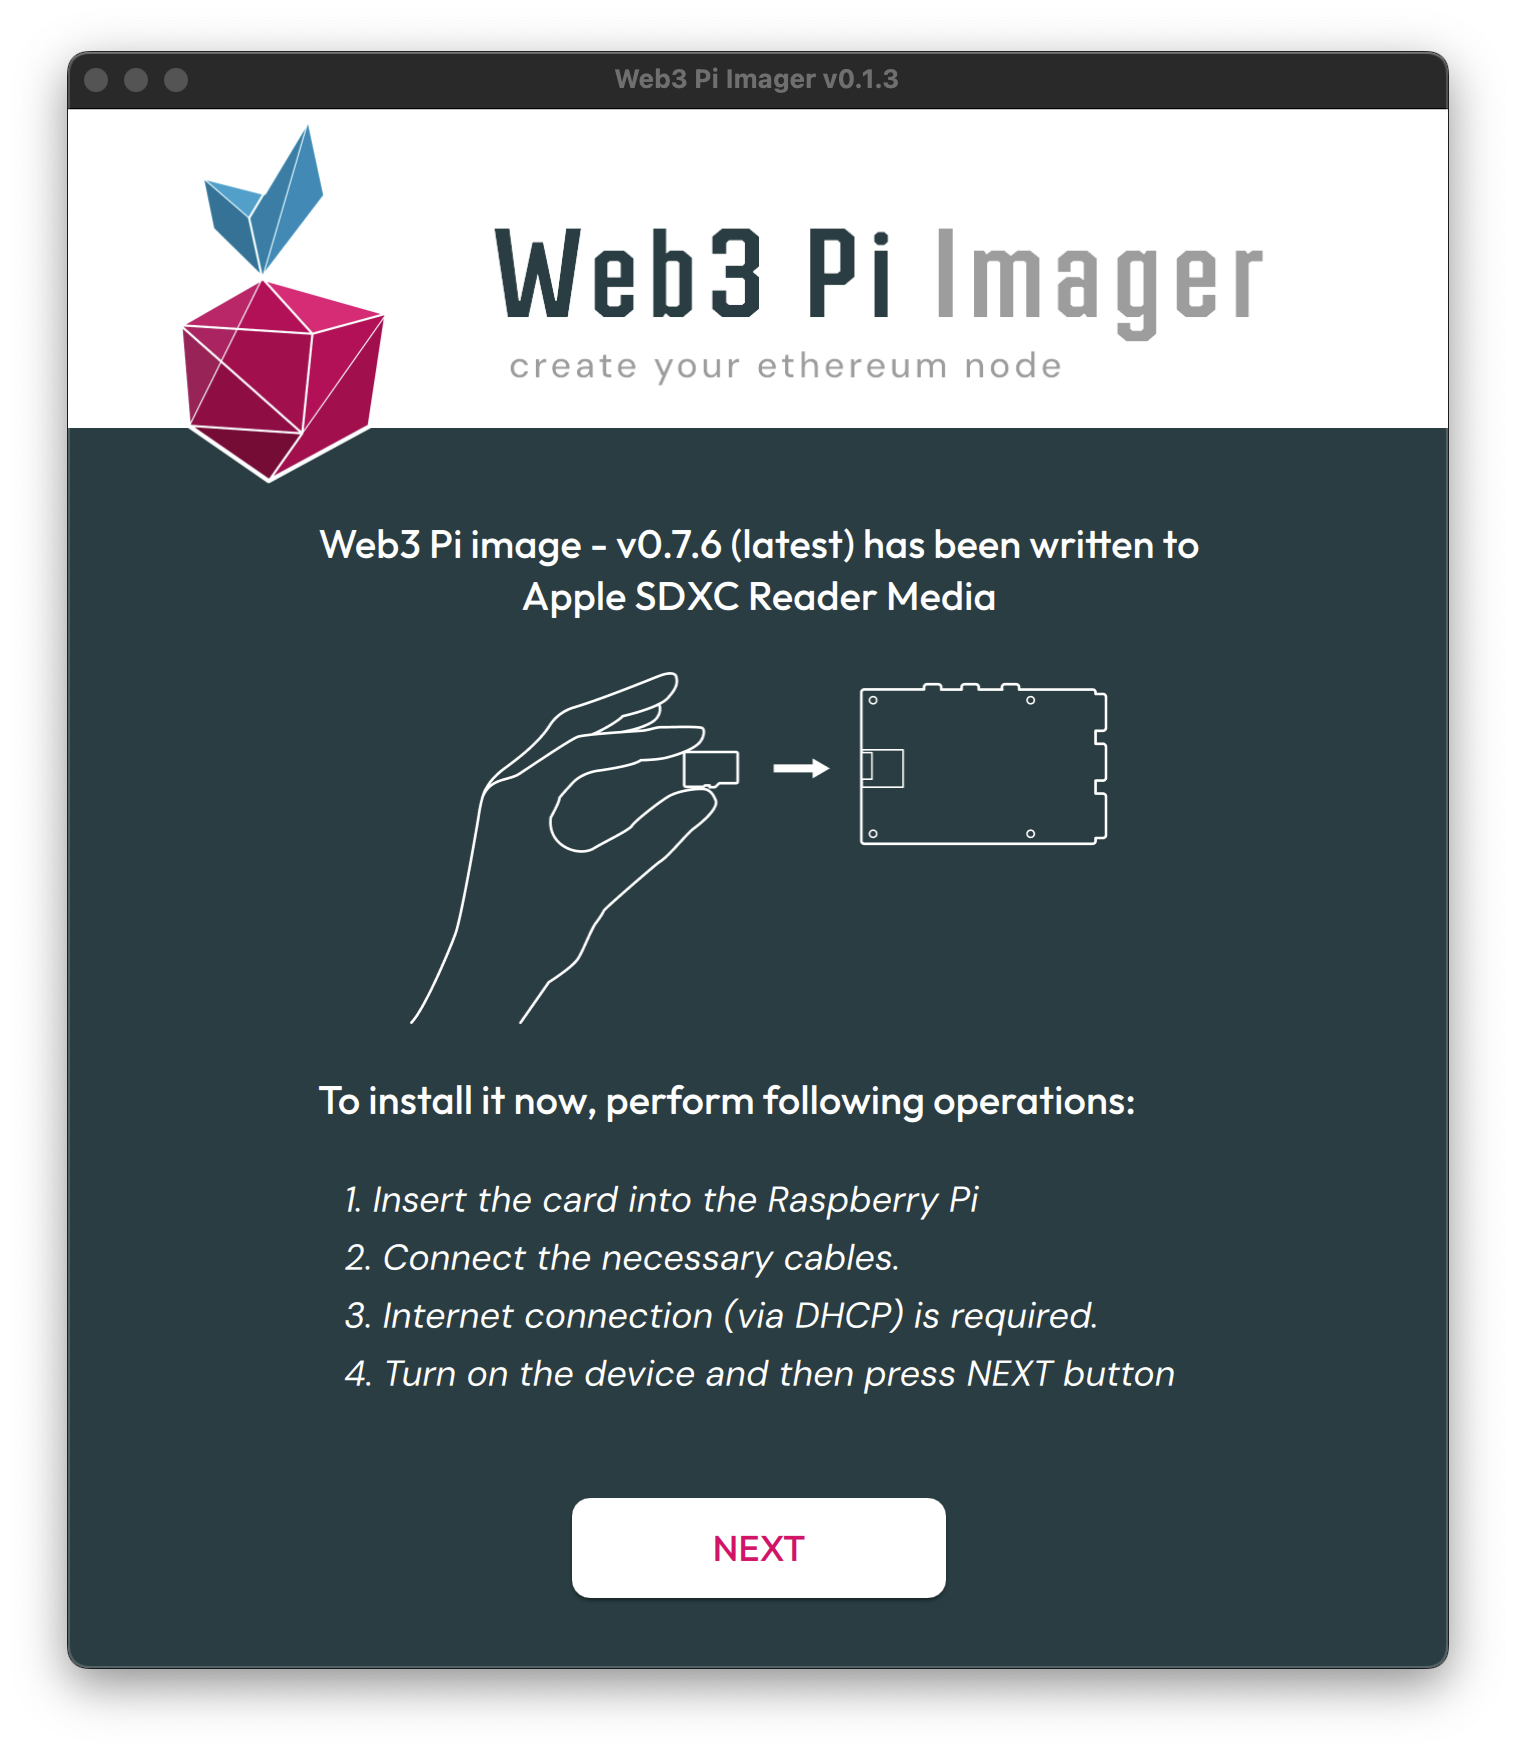
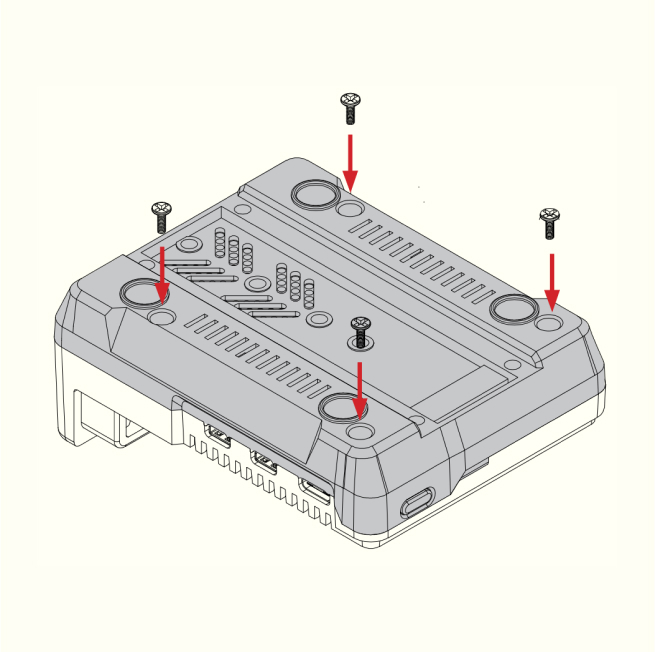
Now after the card has finished writing you will see a screen informing you about installing the prepared card to the device. Stop Web3 Pi Imager at this step and now we will start assembling the device. We will come back to this step after we finish assembling.
Source: https://argon40.com/
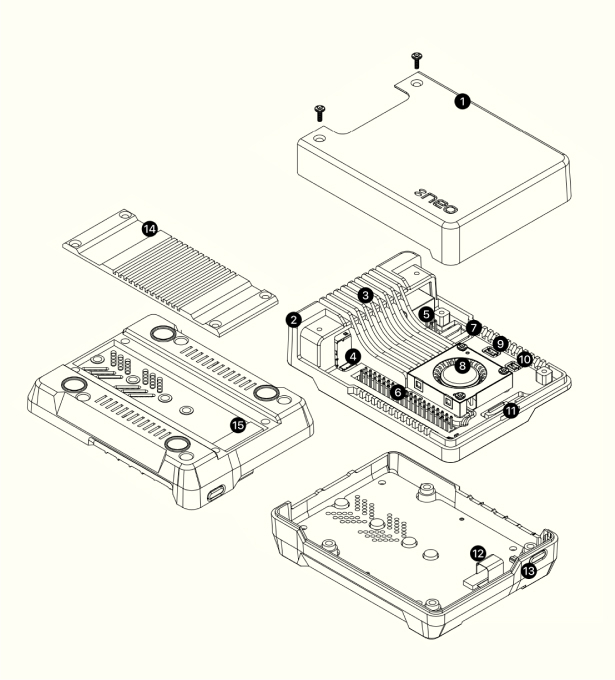
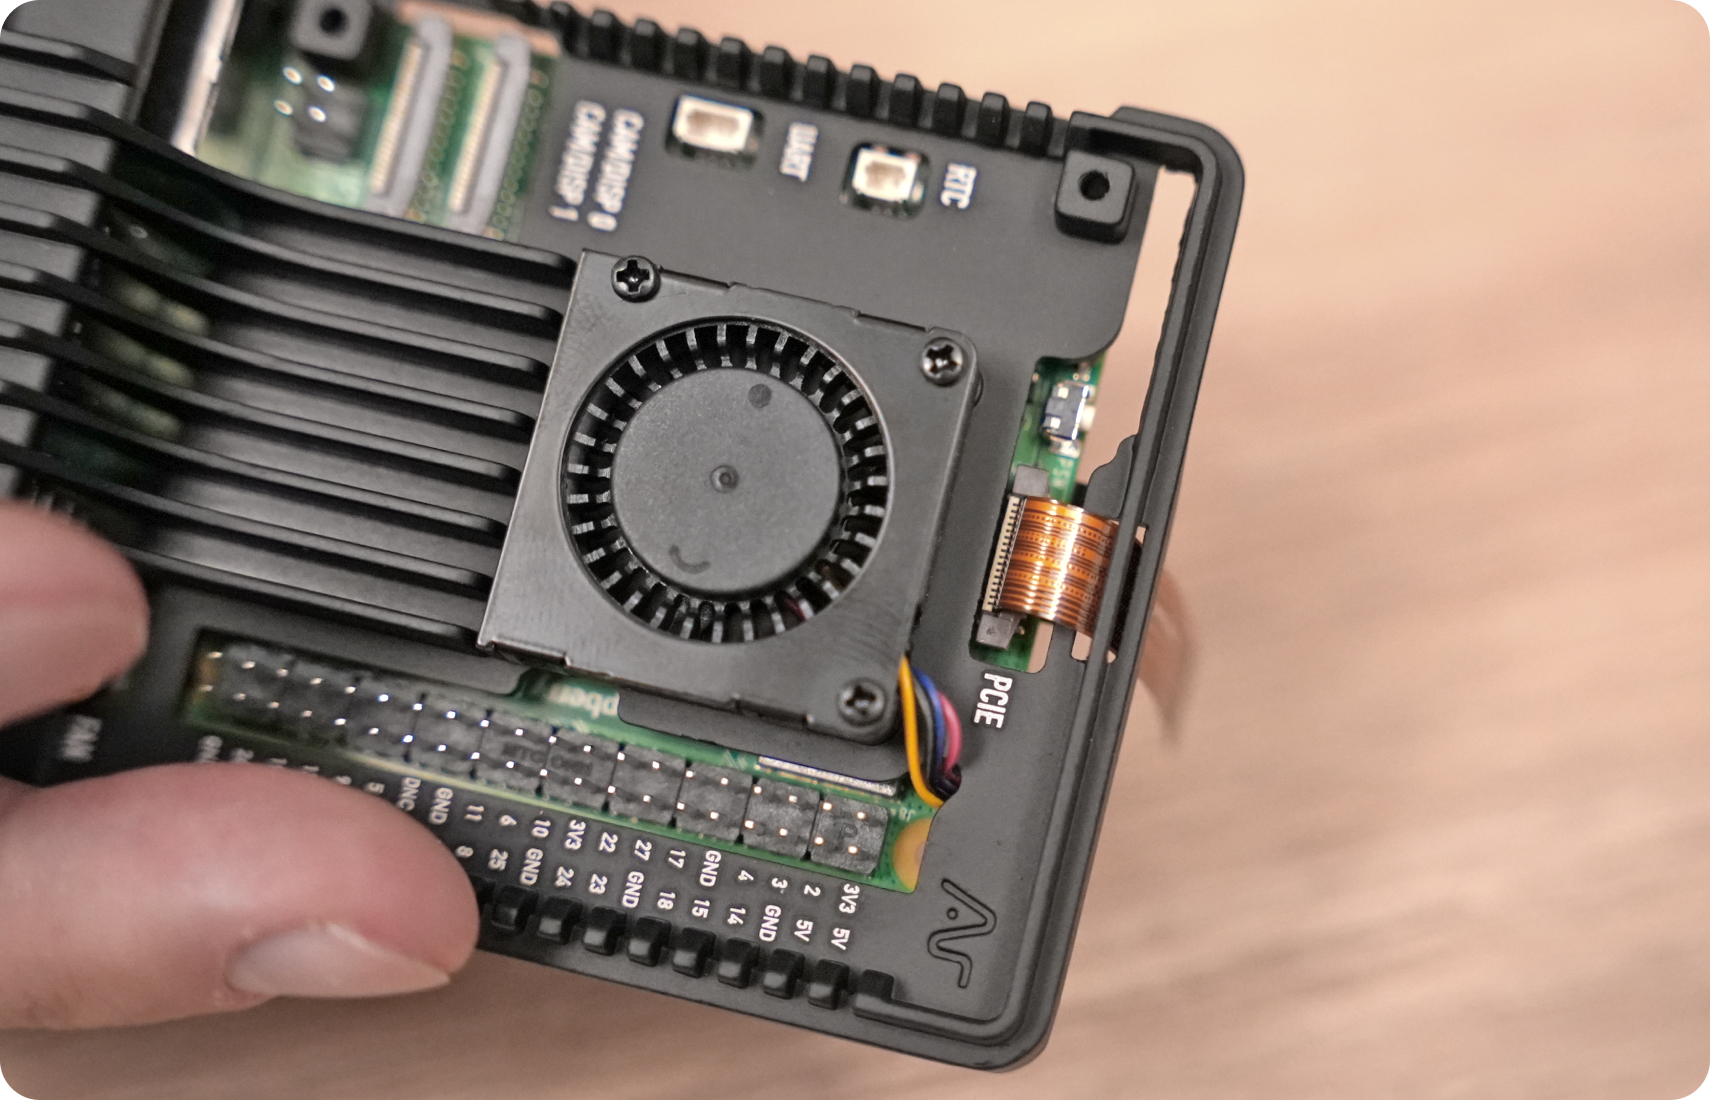
* There may be a small plug inserted in the fan connector. Remove it.
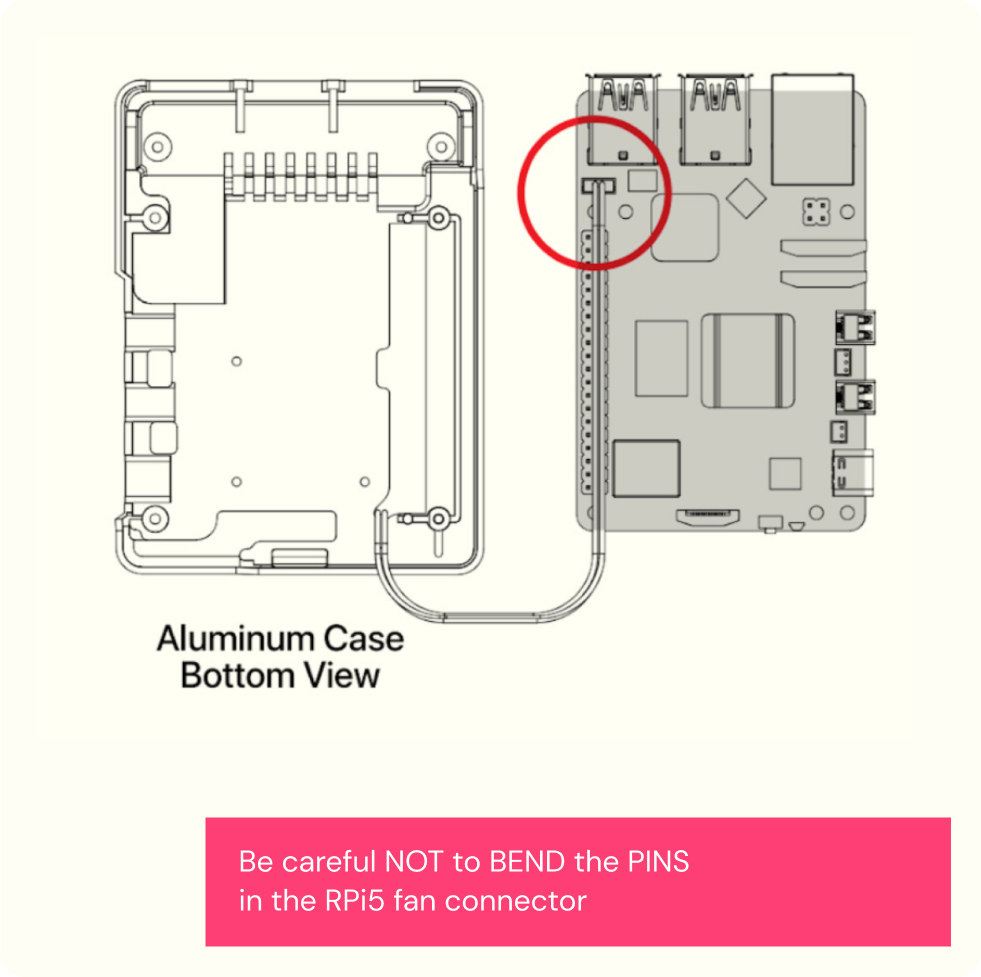
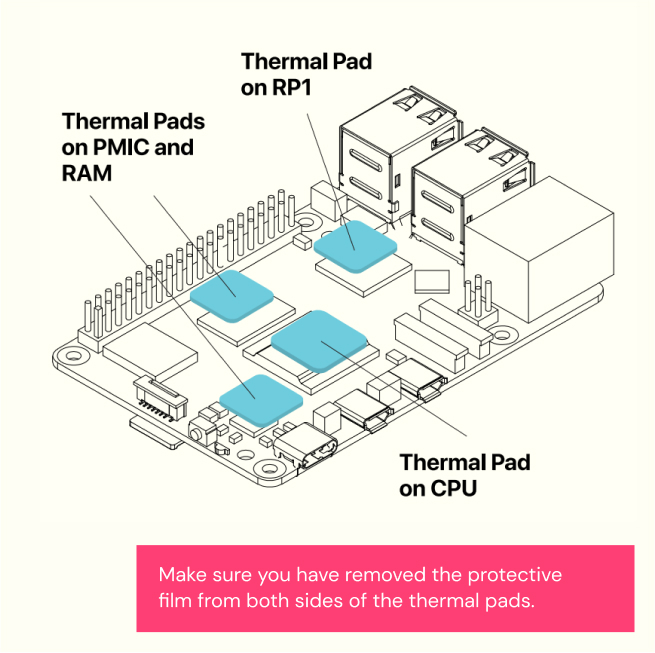
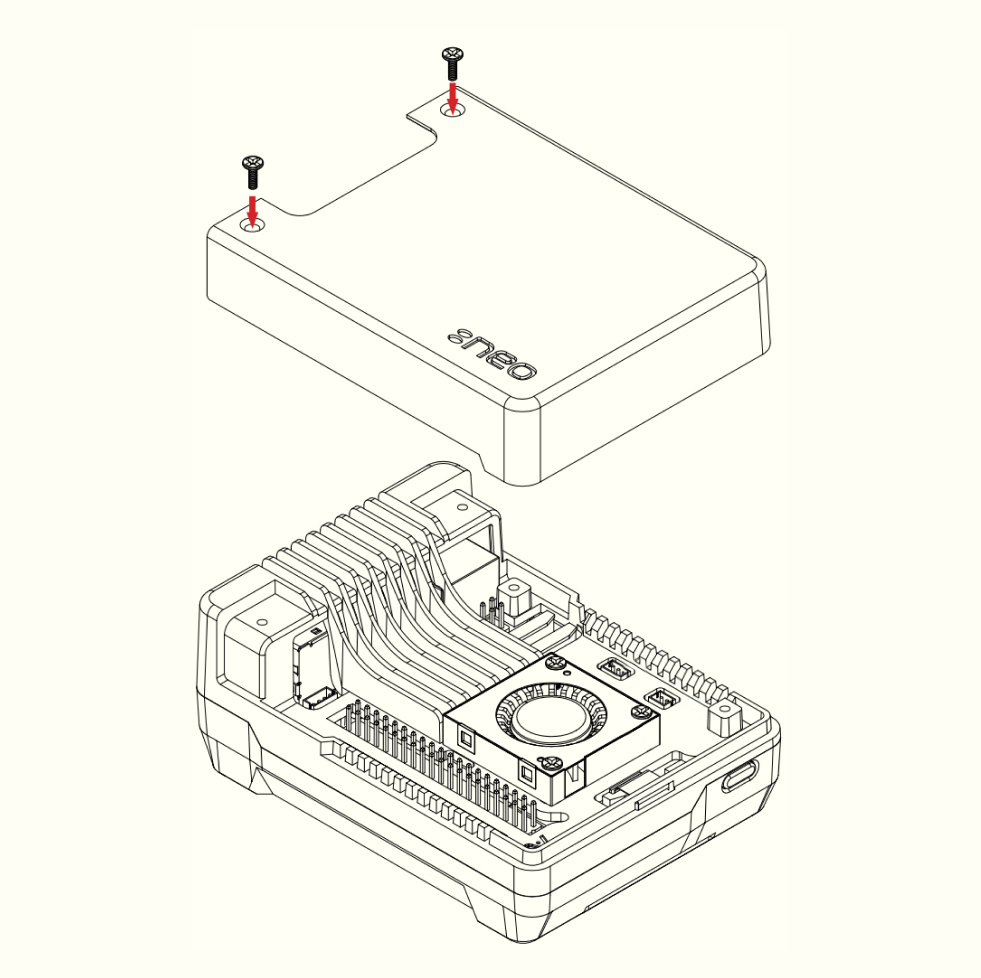
* After inserting and pressing the RPi 5 into the central part of the Argon Neo 5 case, they will adhere due to the stickiness of the thermal pads. To ensure good thermal conductivity, do this once and avoid removing the RPi 5 from this part of the case again.
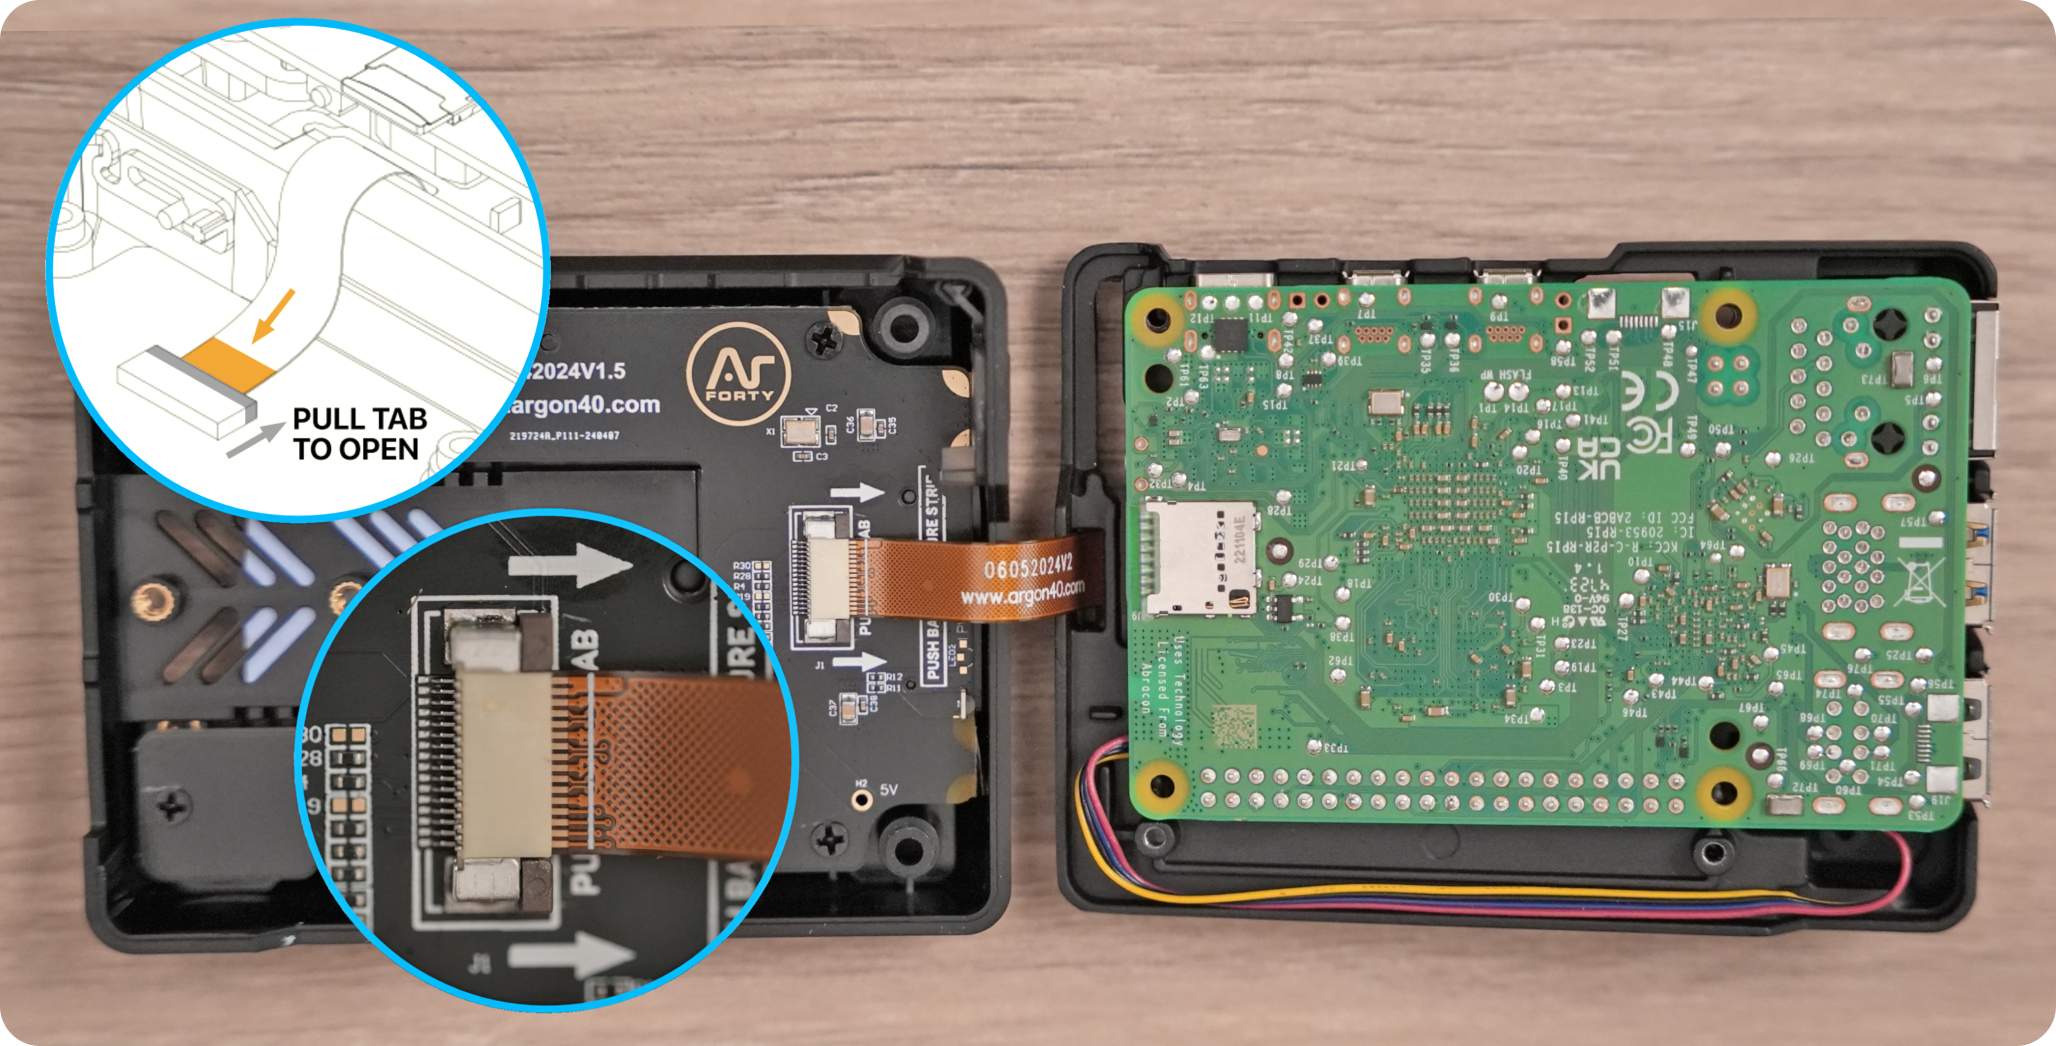
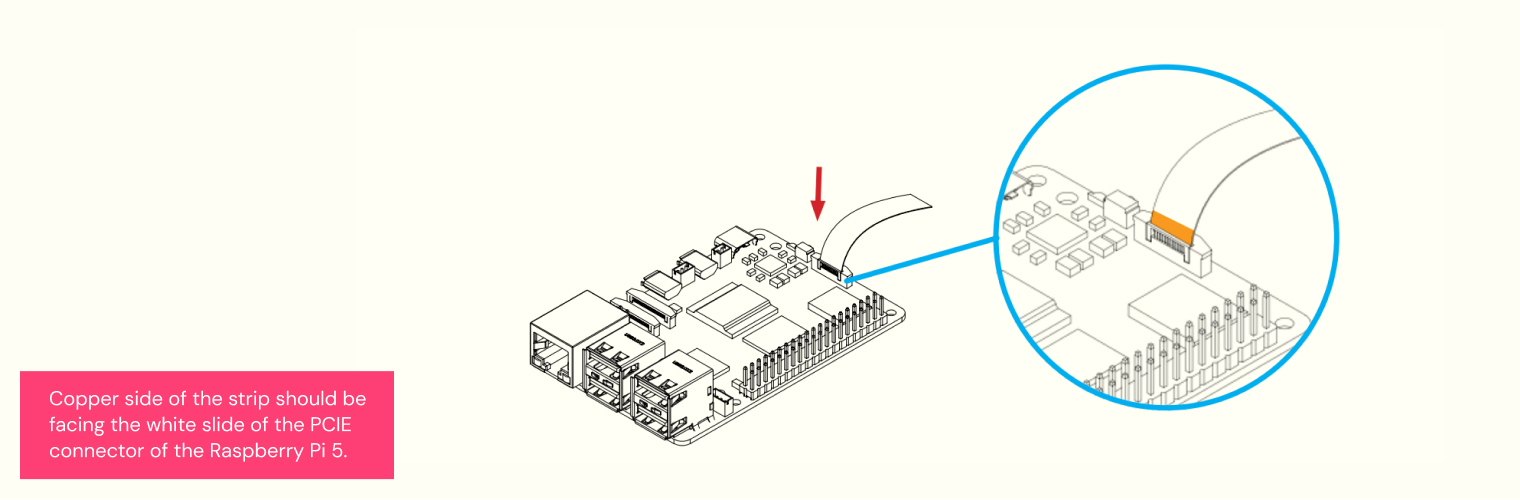
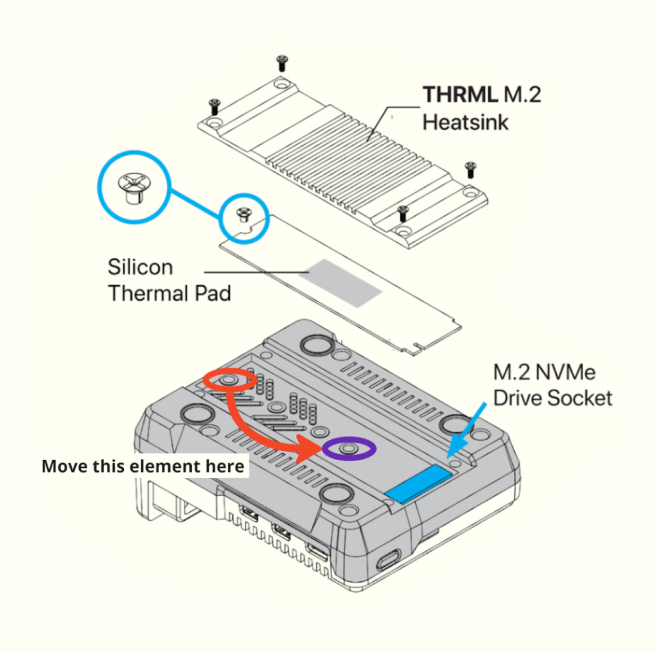
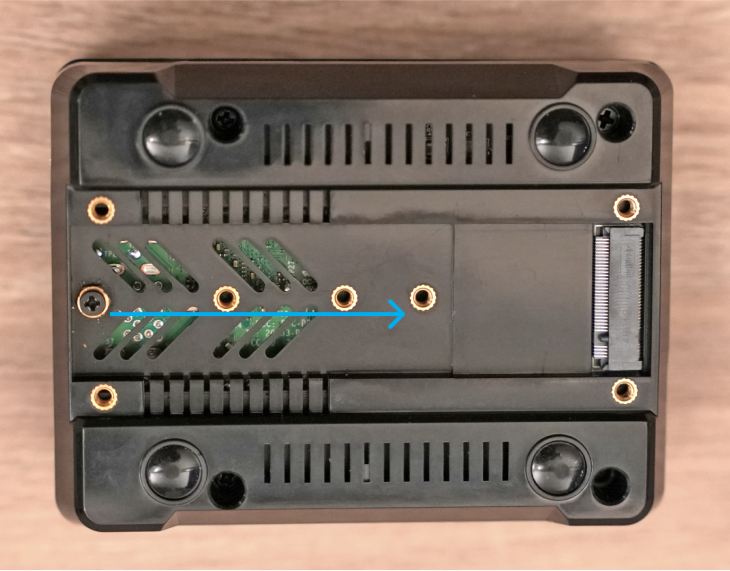
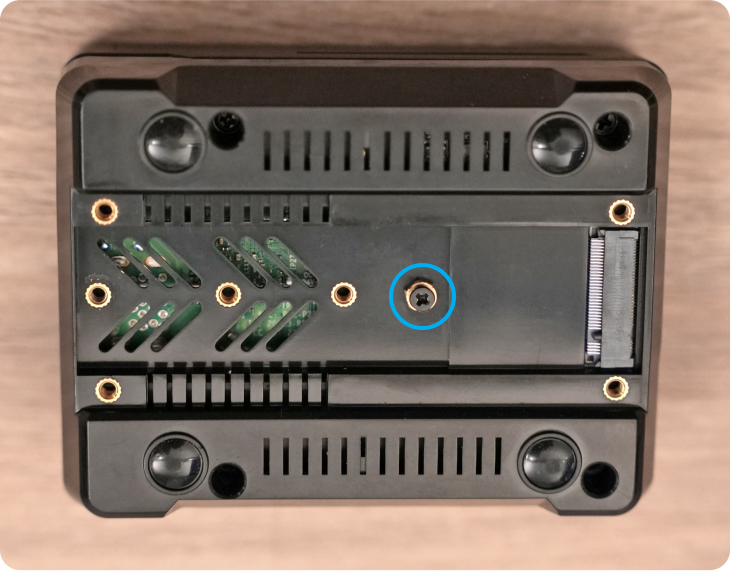
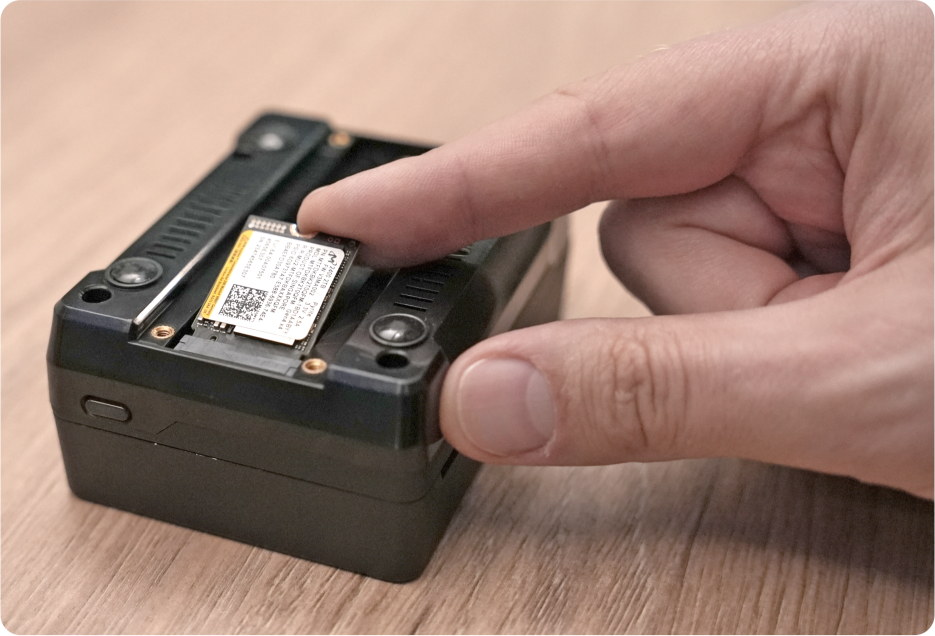
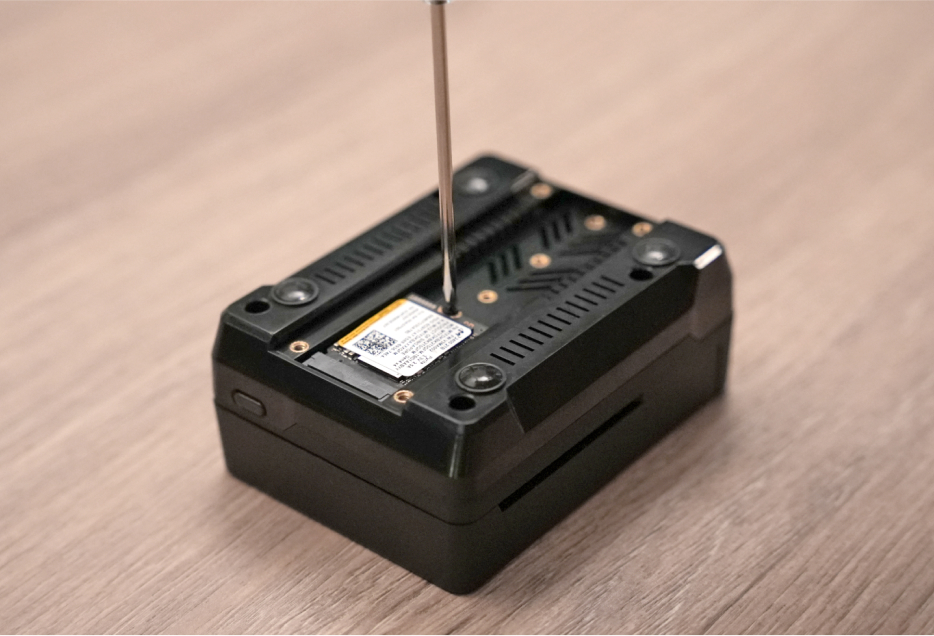
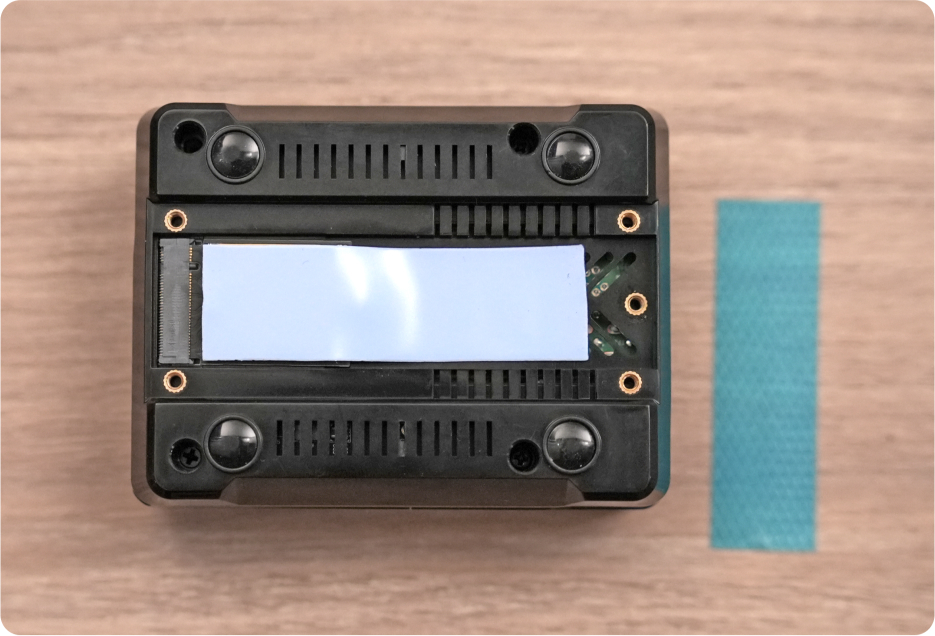
Connect your M.2 NVMe Drive to the Argon NEO 5 M.2 NVMe Carrier Board. Detailed instructions for this process are described in the following steps.
This Board will accept M.2 Key M and M.2 Key B+M NVMe Storage Drive.
This Board will accept M.2 Key M and M.2 Key B+M NVMe Storage Drive.
Before you connect power, make sure that the ethernet cable is connected with DHCP. Internet connection is required during the installation process.
Now that the device is assembled and the card is inside, go back to the Web3 Pi Imager and follow the instructions
Leave the device for about 8-15 minutes to complete the installation process.
Do not disconnect power during this time.
* The time may vary depending on the bandwidth of the internet connection.
Web3 Pi installer has been successfully written to the SD card.
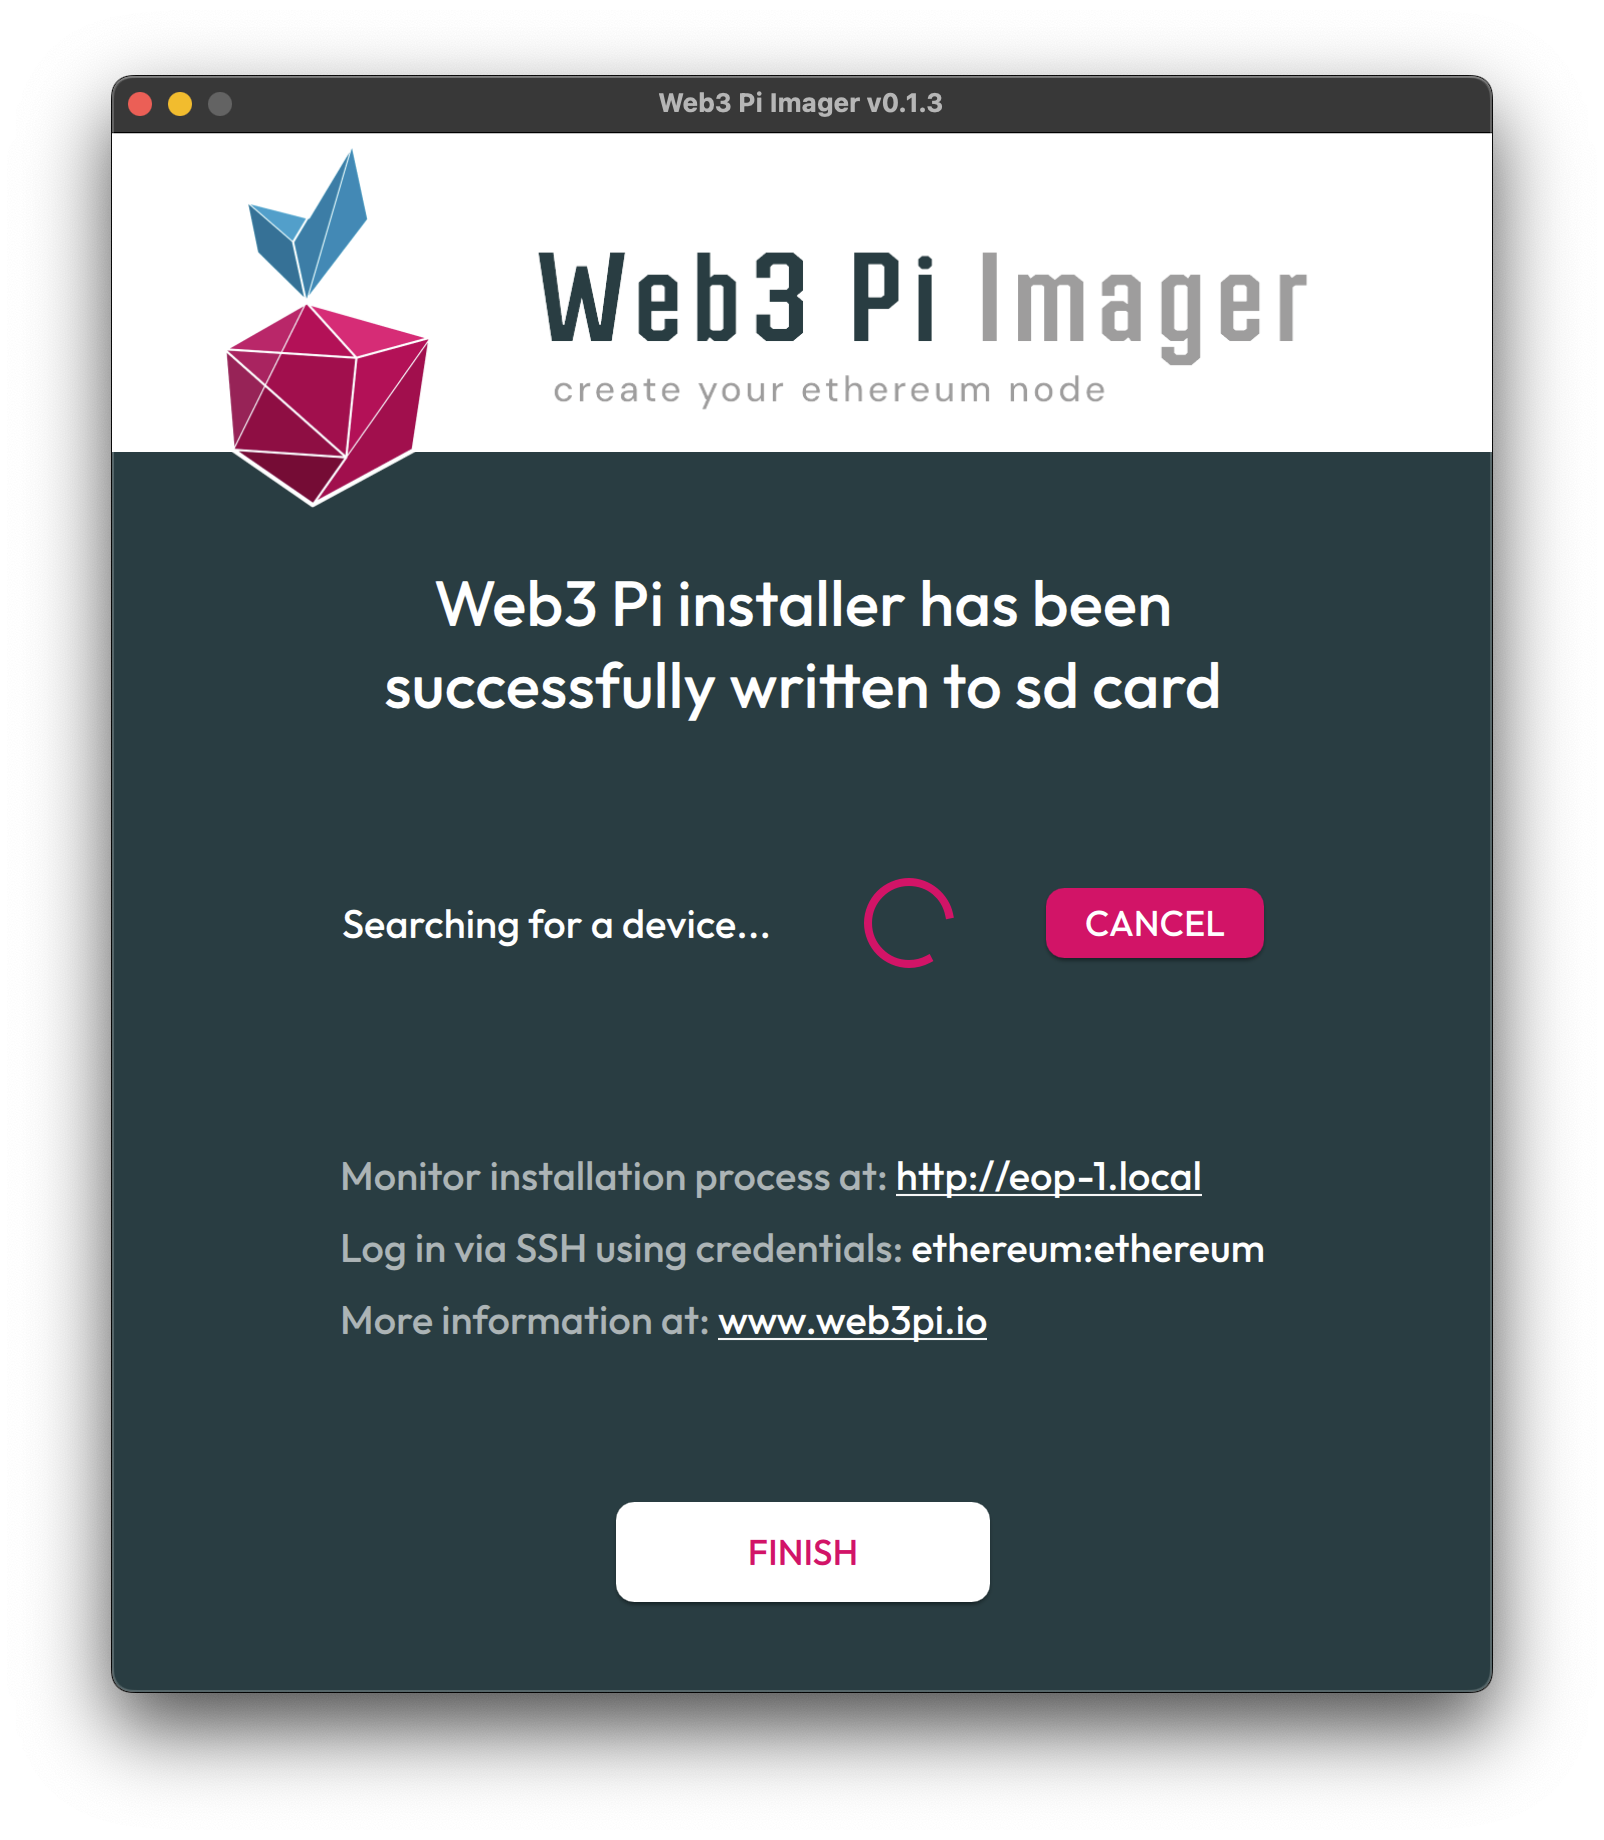
Now you can click the "Track" button - a page with the software installation process on the device will open.
From this point, the user can log in via SSH using the credentials ethereum:ethereum
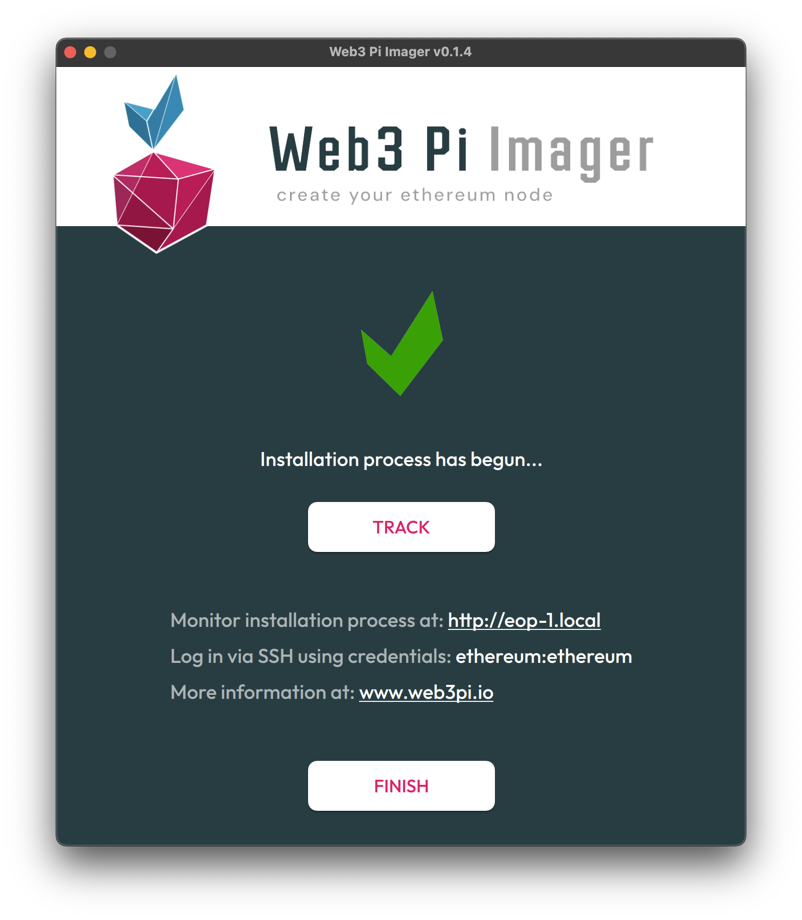
You can monitor the installation process through a dedicated website:
http://eop-1.local
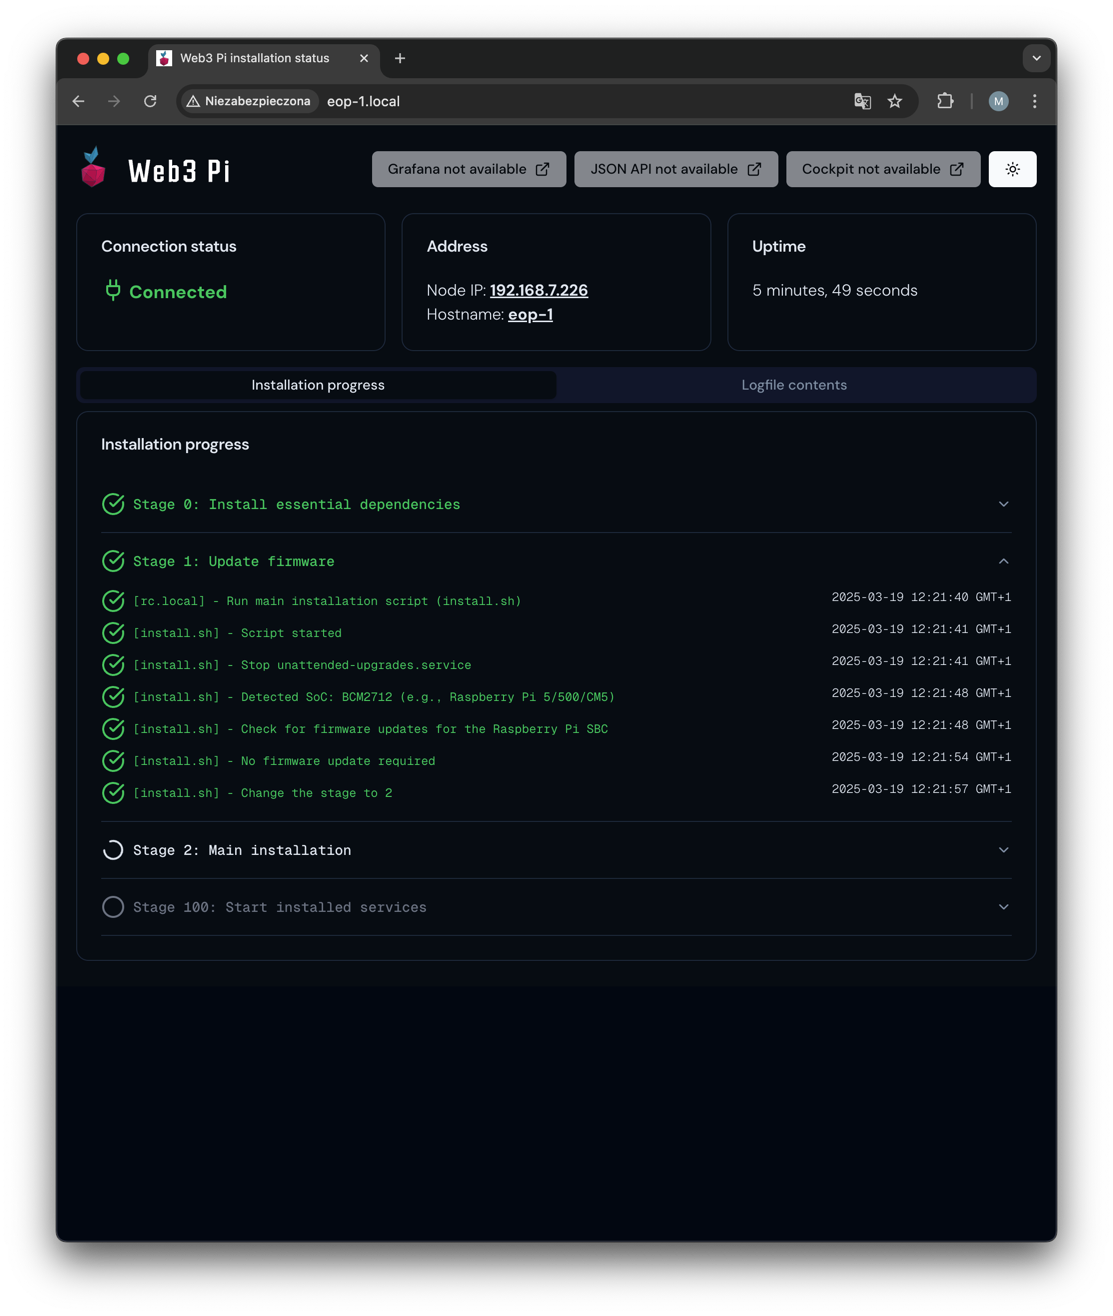
The monitoring should start working approximately three minutes after the device is first switched on.
Replace "eop-1" with your hostname that you entered during the microSD card burning process in Raspberry Pi Imager, if you used a name other than "eop-1".
After approximately 3 minutes from powering on the device for the first time, you should see a similar page.
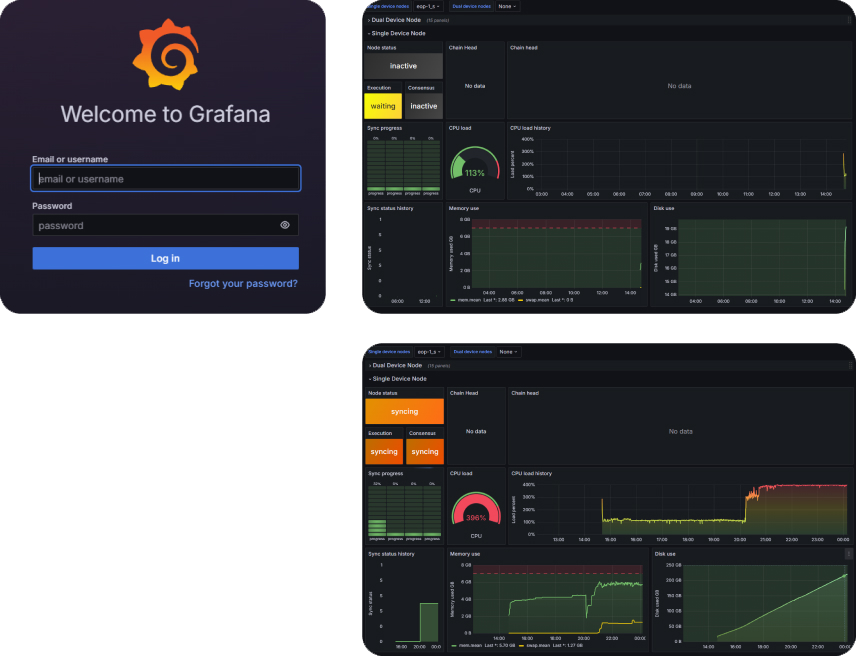
Next, click the link to the Grafana dashboard. If everything has gone smoothly, you should see the login panel. The default username is 'admin', and the password is 'admin'. You will be required to change the password upon first login.
In the Grafana Panel, click on the dashboard named 'Ethereum Nodes Monitor'.
Pay attention to the status of the consensus and execution clients. Initially, both will be 'inactive'
In the next step, the execution client will change to 'waiting'.
Then both will transition to the 'syncing' state.
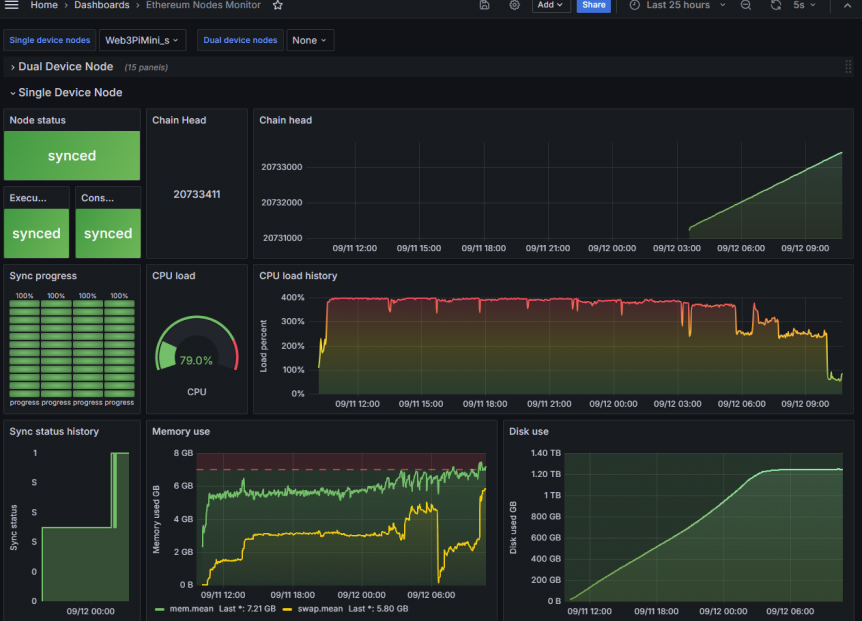
Grafana URL: http://eop-1.local:3000
Full synchronization will be achieved when the status of both the execution and consensus clients turns green ("synced").
After the installation completes successfully, you should have SSH access to the Web3 Pi node.
Username: ethereum
Password: ethereum
You can use [your-hostname].local as the SSH address or the IP address if you know it.
If the ‘ethereum’ user does not exist, it means the installation failed unexpectedly (in such case, please contact support).
By default, the 'ethereum' user is required to change the password during the first login.
Access detailed instructions to set up your Ethereum Node on Raspberry Pi with our comprehensive guide.
High-speed microSD card (preferably 32GB or larger) for storing the operating system and node data files, with plenty of space for future expansions.

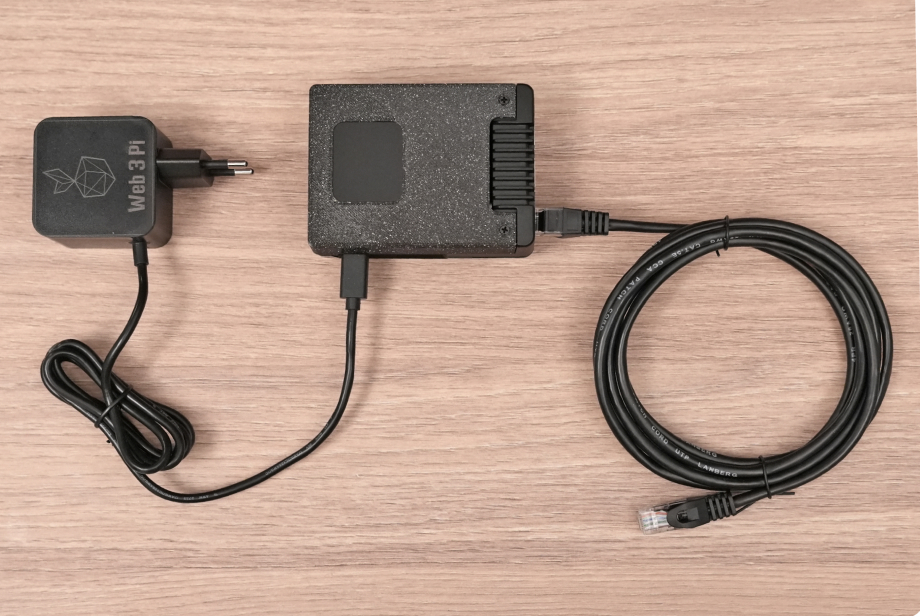
Official Raspberry Pi 5 power adapter with a USB-C connector. Delivers up to 27W for stable and reliable operation.

The heart of Web3 Pi. Powered by an efficient ARM processor, it delivers high performance while maintaining energy efficiency.

A handy tool for flashing your microSD card with the operating system and node data.

Not required for running Web3 Pi, but invaluable for troubleshooting and initial setup.

A 2-meter high-quality Ethernet cable, included to complete the set.

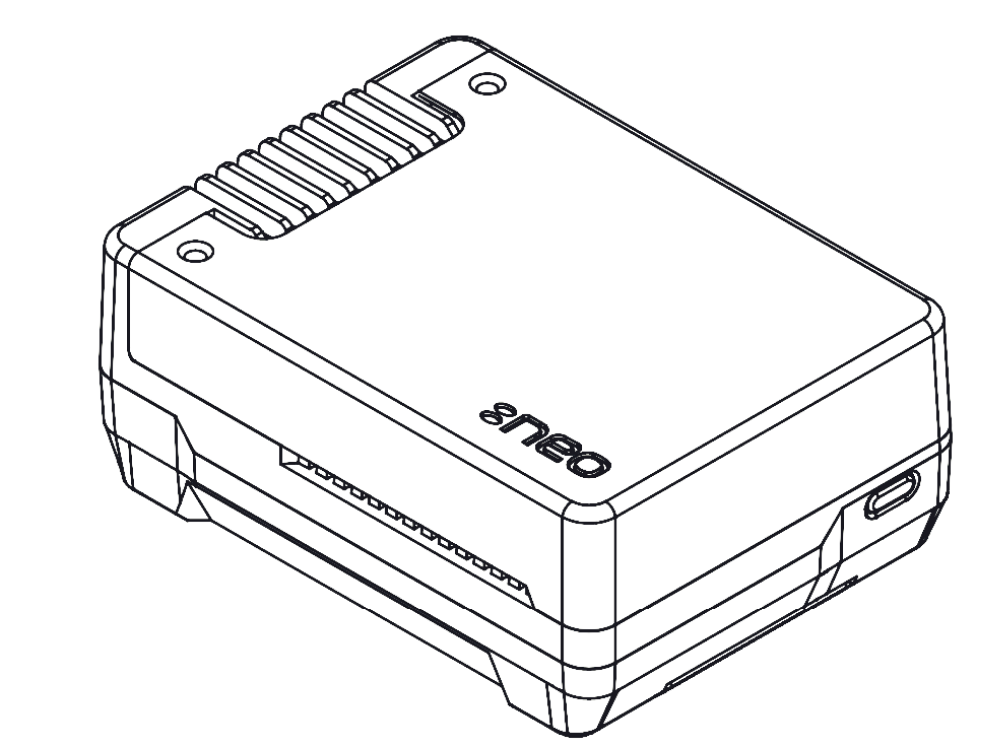
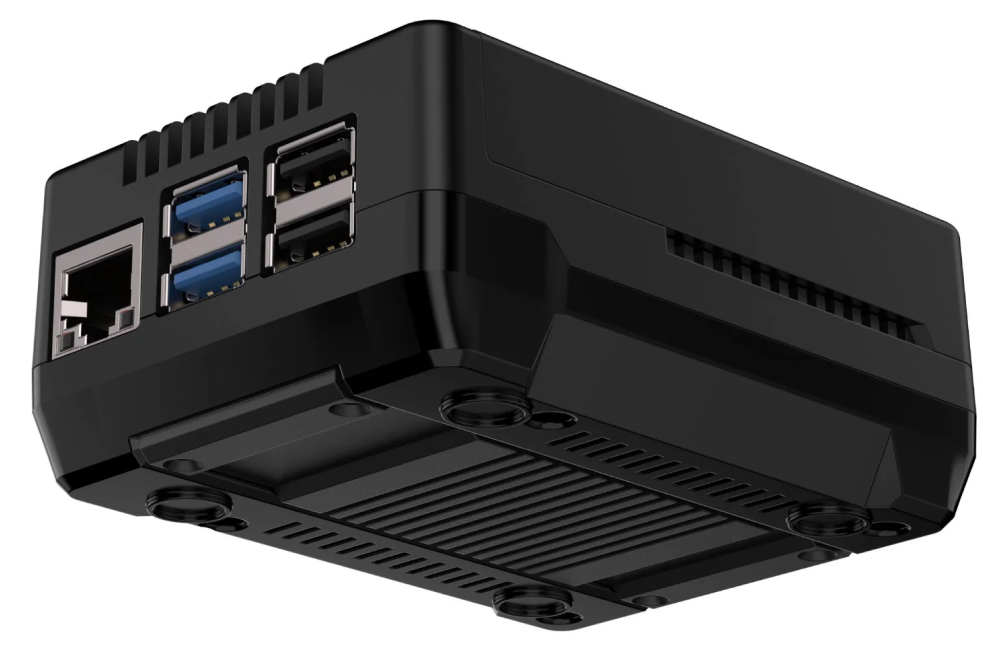
A compact enclosure with active cooling. It looks sleek, provides excellent thermal management, and fits in any corner.

A custom-designed plastic cover, 3D printed specifically for Web3 Pi. It allows for mounting the LCD display while providing a sleek and functional finish.

A set of screwdrivers to tighten screws and secure components. Included to ensure you have everything needed to set up Web3 Pi.

Handy pliers that make hardware assembly easier. Ideal for gripping small components and included for your convenience.

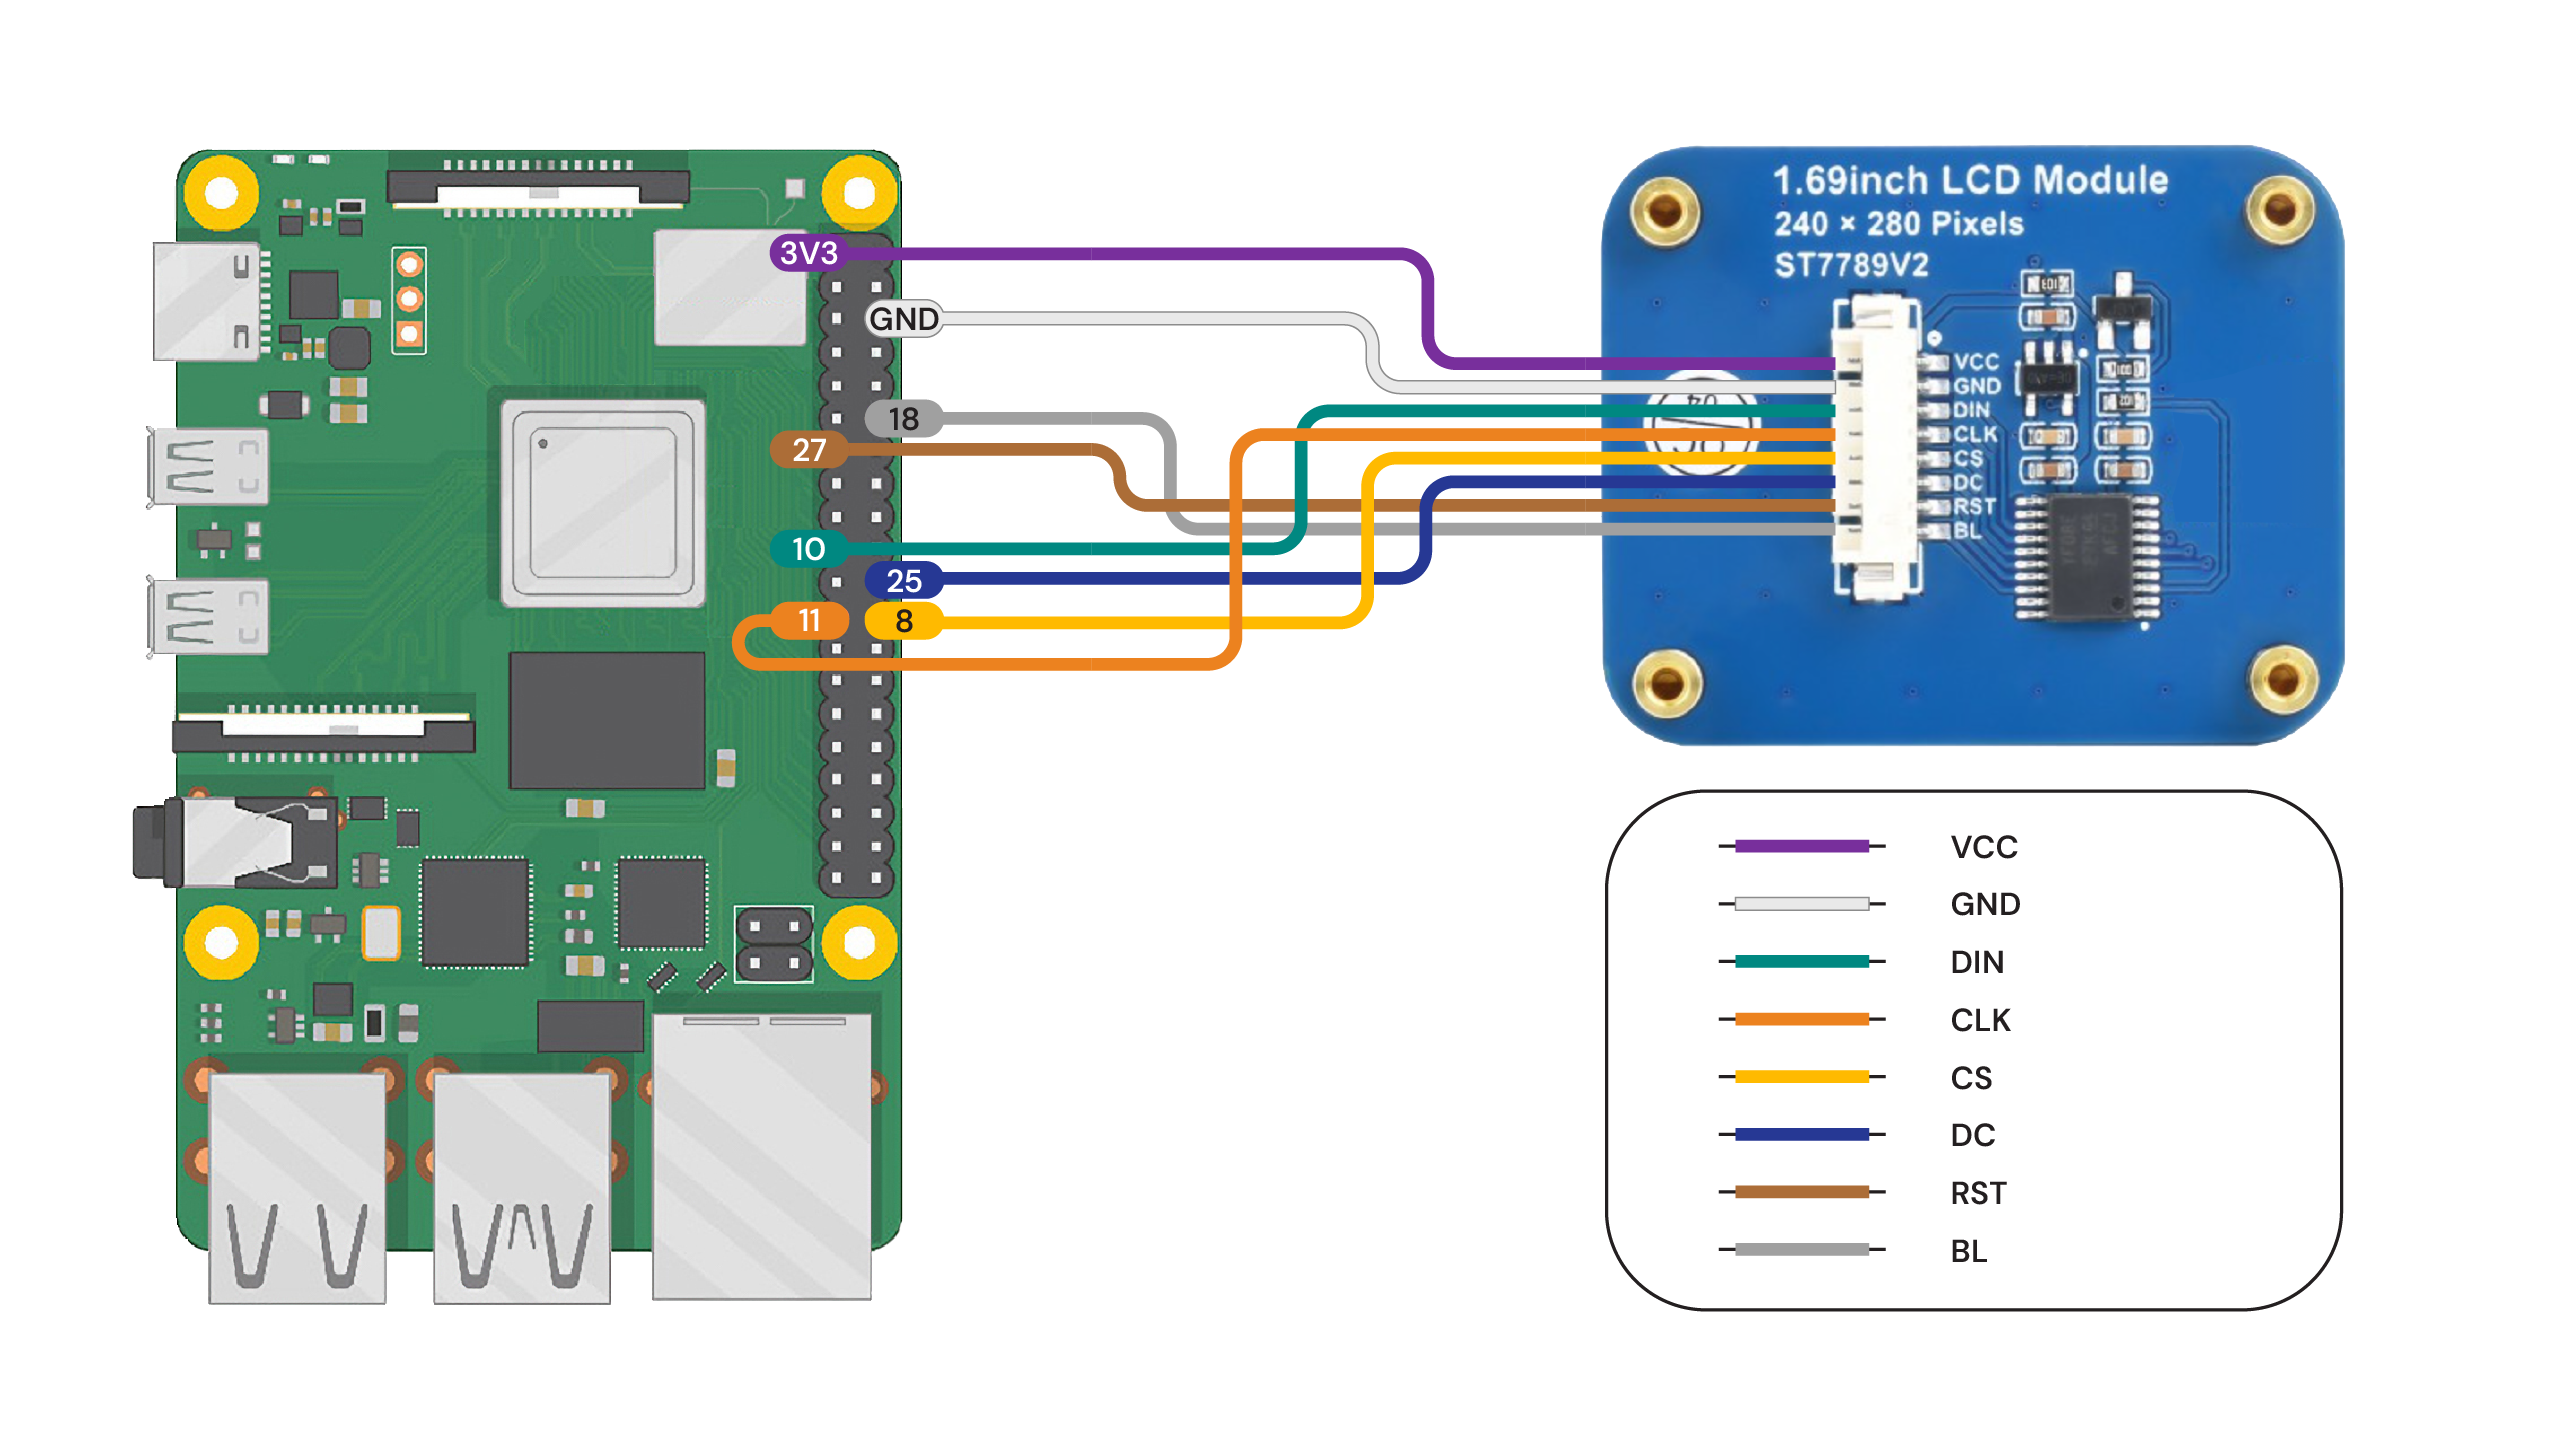
A high-quality LCD screen designed to provide real-time insights into your node and operating system status.

A high-speed 2TB NVMe storage for fast blockchain synchronization. Designed for low power consumption, high performance, and long life.